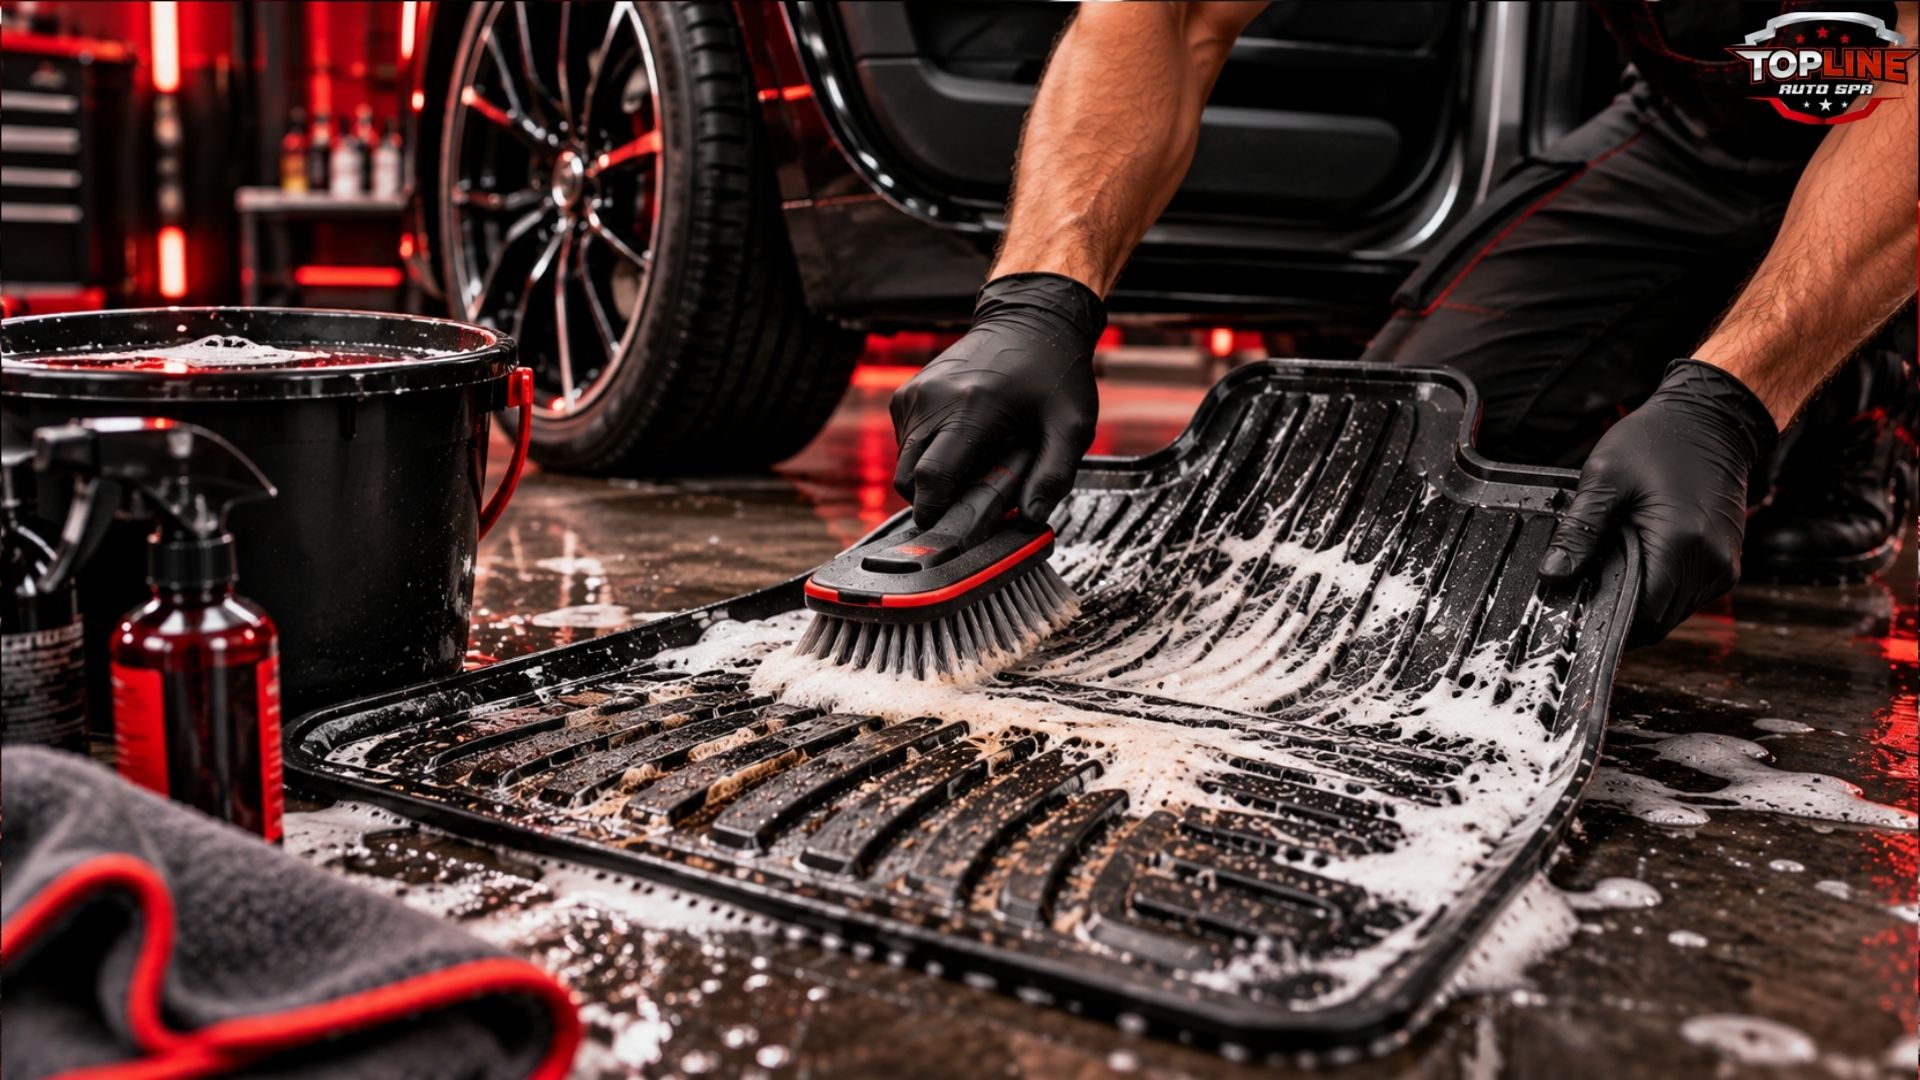
Rubber floor mats take more abuse than almost anything else in your vehicle. They catch mud, slush, road salt, spilled coffee, sand, pet hair, and everything else that rides in on your shoes. They are built to protect the carpet underneath, but they can only do that job well if you keep them clean.
The good news is that rubber mats are among the easiest interior surfaces to restore. With the right products, a stiff brush, and a little patience, you can bring back a dark, even finish without leaving the surface slick or damaging the material.
This guide covers how to clean rubber car floor mats step by step, how to handle stubborn stains and winter salt, which products to avoid, how often to clean, and when it makes sense to bring in a professional. It is written for everyday drivers, including those dealing with Pennsylvania’s wet, salty winters.
The Short Answer: How to Clean Rubber Car Floor Mats
If you want the fast version, here it is:
- Remove the mats from the vehicle.
- Shake and vacuum off loose dirt and debris.
- Rinse with a hose to loosen surface grime.
- Spray with a rubber-safe all-purpose cleaner or a mild soap solution.
- Scrub with a stiff-bristle brush, working into the grooves.
- Rinse thoroughly until no suds or residue remain.
- Dry completely with a microfiber towel and air dry.
- Apply a non-slip, water-based rubber protectant if desired, then reinstall.
The most important details are using a cleaner that will not leave a slippery film and drying the mat fully before putting it back, so moisture does not get trapped against the carpet.
Why Cleaning Rubber Floor Mats Matters
A floor mat is not just cosmetic. Dirty mats affect your vehicle in several practical ways.
- Trapped grit wears down surfaces. Sand and fine debris can grind against the mat, your shoes, and the carpet beneath.
- Salt and moisture cause odors and corrosion risk. In winter, wet salty residue can sit in the mat channels and seep over the edges onto the carpet and floor pan.
- Odors build up. Spilled drinks, food crumbs, and damp debris can create lingering smells.
- Grime reduces grip. A slick layer of dirt and grease on a driver’s mat can interfere with pedal control.
- Appearance suffers. Faded, grimy mats make an otherwise clean interior look neglected.
Regular cleaning keeps the mats doing their job and makes the whole cabin feel fresher.
Rubber vs. Carpet vs. Vinyl Mats: Know What You Have
Before you clean, confirm what material you are working with. Cleaning methods differ, and using the wrong product can leave stains or damage.
| Mat Type | Material Feel | Cleaning Approach | Water Friendly? |
| Rubber (all-weather) | Flexible, slightly textured, often heavy | Brush, rinse, mild cleaner | Yes |
| Thermoplastic (TPE) liners | Rigid but flexible, laser-fit shape | Brush, rinse, mild cleaner | Yes |
| Vinyl | Smooth, slightly glossy, thinner | Gentle cleaner, soft brush | Yes, with care |
| Carpet | Fabric surface | Vacuum, upholstery cleaner, extractor | Limited, must dry thoroughly |
This guide focuses on rubber and rubber-like mats, including many heavy-duty all-weather mats and custom-fit liners. If your vehicle has factory carpet mats underneath, they deserve attention too, and we cover that below.
What You Need Before You Start
You do not need much, and most of it is inexpensive.
Basic Supplies
- A vacuum with a brush or crevice attachment
- A garden hose or pressure source with adjustable spray
- A stiff-bristle brush (nylon, not wire)
- A soft detailing brush for tight grooves
- A rubber-safe all-purpose cleaner, or mild car wash soap
- Two clean microfiber towels
- A bucket
- Gloves, if you use stronger cleaners
Helpful Extras
- Baking soda for odor and light stain lifting
- White vinegar for salt stains
- A water-based, non-greasy rubber protectant
- A drying rack or a clean surface where mats can air dry
Products to Avoid
- Tire shine or silicone-heavy dressings. These can leave the mat slick, which is unsafe on a driver’s side mat.
- Petroleum-based or solvent-heavy cleaners. They can dry out or discolor some rubber materials.
- Wire brushes. They can scratch and tear the textured surface.
- Harsh degreasers left on too long. Strong chemicals can cause staining or dullness.
Always check the mat manufacturer’s care instructions if you have them. Some premium liners have specific recommendations.
How to Clean Rubber Car Floor Mats Step by Step
Step 1: Remove the Mats From the Vehicle
Pull the mats out completely. Cleaning them in place makes it nearly impossible to remove all the dirt, and it risks soaking the carpet underneath. If your mats are clipped or hooked to retention posts, release them according to your vehicle’s design.
Take a moment to look at the carpet or floor pan beneath. If you see dampness, debris, or salt buildup, you will want to address that after the mats are done.
Step 2: Shake Out and Vacuum Loose Debris
Hit each mat against a hard surface a few times to knock off stones, sand, and clumps of dirt. Then vacuum the surface, using a crevice tool to reach into the grooves and channels.
Removing loose material first matters. If you skip this step, you end up making mud rather than cleaning.
Step 3: Rinse With a Hose
Lay the mats flat and rinse them thoroughly with a hose. A moderate spray works well. If you use a pressure washer, keep it at a safe distance and a reasonable setting, since concentrated pressure can damage the surface or lift edges and logos.
This first rinse loosens surface grime and makes the cleaner more effective.
Step 4: Apply a Cleaner
Spray your rubber-safe all-purpose cleaner over the entire mat, or mix a few drops of car wash soap in a bucket of water and work it over the surface with a brush. Let it dwell for a minute or two so it can break down oils and grime. Do not let it dry on the surface.
Pay attention to the areas that take the most wear: the driver’s heel area, the edges where mud collects, and any deep channels in all-weather designs.
Step 5: Scrub the Surface and Grooves
Use a stiff-bristle brush and work in overlapping passes. Scrub with the direction of the grooves where possible, and use a smaller brush for tight corners and textured sections.
For stubborn grime, apply a bit more cleaner and let it sit before scrubbing again. Let the product do the work rather than pressing harder, which can wear the surface unevenly.
Step 6: Rinse Until the Water Runs Clear
Rinse the mat completely. Leftover soap or cleaner can attract new dirt and leave a sticky or slippery film. Keep rinsing until there are no suds and the water running off the mat looks clean.
Step 7: Dry Completely
Wipe the mat with a clean microfiber towel, then let it air dry in the shade or in a well-ventilated space. Flip it over to make sure both sides and the channels are dry. Avoid leaving rubber mats in strong direct sun for extended periods, since heat can contribute to fading or warping on some materials.
This step is critical. A damp mat placed back on carpet traps moisture, which is a common cause of musty odors and mildew.
Step 8: Protect and Reinstall
If you want a clean, factory-dark appearance, apply a thin layer of a water-based, non-greasy rubber protectant with an applicator pad, then wipe off any excess. The mat should feel dry to the touch, not slick. Skip protectant on the driver’s side if you are unsure of the product’s grip safety.
Reinstall the mats and make sure the driver’s mat is securely anchored so it cannot slide forward and interfere with the pedals.
How to Remove Tough Stains and Residue From Rubber Mats
Basic washing handles routine dirt, but some problems need targeted treatment.
White Salt Stains and Winter Residue
Road salt leaves chalky white streaks that can reappear after the mat dries. In the Lehigh Valley, where roads are treated heavily through winter, this is one of the most common complaints.
- Mix equal parts white vinegar and warm water.
- Spray or apply it to the salt marks and let it sit for a few minutes.
- Scrub with a stiff brush.
- Rinse thoroughly and dry.
Repeat if marks remain. Rinsing well matters, since vinegar residue left behind can have an odor.
Mud and Ground-In Dirt
Soak the mat with soapy water for several minutes before scrubbing. Dried mud softens and lifts more easily this way, which means less scrubbing and less wear on the surface.
Grease and Oil Marks
Apply a rubber-safe degreaser or all-purpose cleaner directly to the spot. Let it dwell briefly, agitate with a brush, and rinse. Follow with a normal wash to remove any leftover residue so the area does not stay slick.
Coffee, Soda, and Sticky Spills
Rinse first, then wash with warm soapy water. Sugary residue gets tacky as it dries, so scrub the area until it no longer feels sticky when rinsed.
Dull, Faded, or Gray Rubber
Gray, chalky mats are usually dry or oxidized, not just dirty. After a deep clean, a water-based rubber conditioner can restore color and depth. Avoid heavy, oily dressings, which can look good initially but attract dust and create a slippery surface.
Odors
Sprinkle baking soda over a damp, clean mat, let it sit for 15 to 30 minutes, then scrub and rinse. If odors persist, check the carpet beneath the mat for moisture or spills, since the smell often comes from underneath.
Don’t Forget What’s Underneath the Mats
A spotless mat on top of a dirty floor does not fix the problem. After cleaning the mats, take a few minutes to check the carpet and floor pan.
- Vacuum the carpet thoroughly while the mats are out.
- Spot treat any stains with an automotive carpet or upholstery cleaner.
- Check for dampness, especially after winter. Moisture trapped under mats can lead to odors and mildew over time.
- Let the area dry fully before the mats go back in.
When the interior needs more than a quick refresh, such as deep carpet stains, persistent odors, or heavy salt buildup, professional interior detailing can restore the carpet, seats, and surfaces together, using hot water extraction and detailing tools that are hard to match at home. For many drivers, a seasonal deep clean after winter is a practical way to reset the cabin.
While you are working on the interior, it makes sense to look at other high-contact surfaces. If your seats are leather, this guide on cleaning leather seats walks through a safe approach that pairs well with a fresh set of mats.
Hand Washing vs. Pressure Washing vs. Machine Cleaning
| Method | Pros | Cons | Best For |
| Hand scrubbing with brush | Gentle, controlled, effective on grooves | Takes more time and effort | Routine cleaning, most rubber mats |
| Pressure washer | Fast, removes heavy mud | Can damage edges or logos if too close | Heavily soiled all-weather mats |
| Foam cleaner and brush | Good dwell time, lifts oils | Needs thorough rinsing | Grease and ground-in grime |
| Professional extraction and detailing | Deep clean of mats, carpet, and floor | Costs more than DIY | Heavy staining, odors, or seasonal resets |
For most owners, hand scrubbing with a brush and a rubber-safe cleaner is the best balance of safety and results.
How Often Should You Clean Rubber Car Floor Mats?
The right schedule depends on how you drive and where you live.
- Light use, mostly paved commuting: Every 4 to 6 weeks.
- Regular use with kids, pets, or work boots: Every 2 to 4 weeks.
- Winter months with road salt: Rinse every one to two weeks and deep clean monthly.
- After spills or muddy trips: As soon as practical, since stains and odors are easier to prevent than remove.
A quick shake and rinse between full cleanings makes each deep clean easier.
Common Mistakes When Cleaning Rubber Car Mats
Small errors can leave mats looking worse or feeling unsafe.
- Using tire shine or greasy dressings. The mat looks glossy but becomes dangerously slick underfoot.
- Skipping the rinse. Leftover soap attracts dirt and can leave a film.
- Putting wet mats back in the car. Trapped moisture causes odors and mildew.
- Using abrasive tools. Wire brushes and harsh scouring pads damage the texture.
- Ignoring the driver’s side mat anchor. A loose mat can slide and interfere with the pedals.
- Using solvent-based cleaners. They can dry out rubber and cause discoloration.
- Cleaning the mats but not the carpet. Odors and moisture often come from underneath.
- Leaving mats in direct sun to dry for hours. Excess heat can contribute to fading and warping.
DIY Cleaning vs. Professional Interior Detailing
| Factor | DIY | Professional |
| Cost | Low, mostly product and time | Higher, but includes full interior attention |
| Time | One to two hours for mats and carpet | Handled by trained technicians |
| Deep stain removal | Limited without extraction tools | Better access to specialized equipment |
| Odor treatment | Surface level in many cases | Can address carpet, padding, and surfaces |
| Best for | Routine maintenance | Seasonal resets, heavily soiled interiors |
DIY is perfect for routine care. Professional help makes sense when stains have set in, odors will not go away, the vehicle is being prepared for sale, or you simply want the whole interior brought back to a high standard.
If you are weighing extra options during a visit, TopLine Auto Spa also offers add-on services that can be added to a detailing appointment, which is a convenient way to address specific problem areas without booking separate visits.
Suggested placement: A gentle “Book Now” prompt here for readers who would rather have the whole interior handled professionally.
How to Keep Rubber Mats Cleaner Longer
A few habits reduce how often you have to deep clean.
- Knock dirt and snow off your shoes before getting in.
- Shake out the mats weekly.
- Rinse them quickly after salty or muddy trips.
- Keep a small towel in the car for spills.
- Use all-weather or laser-fit liners with raised edges in winter to contain slush and meltwater.
- Re-check the driver’s side retention clips after each cleaning.
- Vacuum the carpet around the mats regularly.
These small steps keep grime from building into stains and make every wash faster.
Recommended External Resources
Consider linking to reputable, non-competing sources, such as the mat or liner manufacturer’s care guidelines for your specific brand, a recognized consumer automotive resource on interior care, and a safety source that covers floor mat placement and pedal interference. Verify that each URL is live and relevant before adding.
Conclusion
Cleaning rubber car floor mats is straightforward when you follow a consistent routine: remove the mats, shake and vacuum, rinse, apply a rubber-safe cleaner, scrub the grooves, rinse again, and dry completely. Use targeted treatments for winter salt, grease, and sticky spills, and avoid slippery dressings that can make the driver’s mat unsafe.
Clean mats also make it easier to notice problems underneath, such as dampness, odors, or carpet stains that need attention. For those deeper jobs, a professional interior detail can save time and give you a more thorough result.
Once the inside of your vehicle is under control, it helps to think about the outside too. A ceramic coating can make your paint easier to wash and more resistant to the salt, grime, and contaminants that Lehigh Valley drivers deal with every season, which keeps your whole vehicle easier to maintain.
Book Now to get your floor mats, carpets, and cabin professionally refreshed.
Frequently Asked Questions
What is the best way to clean rubber car floor mats?
Remove the mats, shake and vacuum off debris, rinse with a hose, scrub with a rubber-safe cleaner and a stiff brush, rinse again, and dry completely. This method removes dirt without leaving a slippery film or damaging the surface.
Can I use dish soap to clean rubber car mats?
Yes, a small amount of mild dish soap mixed with water works for light cleaning. Rinse thoroughly, since leftover soap can leave residue. For regular maintenance, a dedicated rubber-safe cleaner or car wash soap is usually a better choice.
How do I remove white salt stains from rubber floor mats?
Mix equal parts white vinegar and warm water, apply it to the stains, let it sit a few minutes, scrub with a brush, and rinse thoroughly. Repeat if needed, and dry the mat completely afterward.
Can I use tire shine on rubber floor mats?
It is not recommended. Tire shine and silicone-heavy dressings can make mats slippery, which is a safety risk, especially for the driver’s side. Use a water-based, non-greasy protectant instead, or leave the mat unprotected.
How often should I clean rubber car floor mats?
Every 2 to 6 weeks for most drivers, depending on use. In winter, rinse them every week or two and deep clean monthly to remove road salt and slush residue.
Is it safe to pressure wash rubber car mats?
Generally yes, if you use a moderate setting and keep a safe distance. Concentrated pressure held close can damage edges, logos, or the surface texture, so test on a small area first.
Why do my rubber floor mats look faded or gray?
Gray or chalky mats are often dry or oxidized from sun exposure, heat, and repeated cleaning. A deep clean followed by a water-based rubber conditioner can restore color. Avoid greasy products that attract dirt and make the surface slick.
How do I get the smell out of rubber car mats?
Wash the mat thoroughly, then sprinkle baking soda over the damp surface, let it sit for 15 to 30 minutes, scrub, and rinse. Also check the carpet beneath the mat, since odors often come from trapped moisture or spills underneath.
Should I clean the carpet under my rubber floor mats?
Yes. Dirt, salt, and moisture can pass around the edges of a mat and settle in the carpet. Vacuum and spot treat the carpet while the mats are out, and let everything dry before reinstalling.