Adhesive residue on your car’s paint is frustrating. Whether you’re dealing with leftover sticker residue, tape marks, protective film adhesive, or decal glue, that sticky mess seems stubborn and permanent. The challenge is removing it without scratching the clear coat or damaging the paint underneath.
You’ve probably already tried the obvious approach: scraping with your fingernail or a plastic scraper. That works sometimes, but other times you end up with adhesive that won’t budge or, worse, you accidentally scratch the paint in the process. You need proven methods that actually work.
The good news is that adhesive removal from car paint is absolutely doable if you know the right techniques and products. Different types of adhesive respond to different approaches. Some come off with heat. Others require solvents. A few need patience and specific products designed for automotive applications.
This complete guide walks you through every method, from gentle approaches for fresh adhesive to aggressive techniques for stubborn residue. You’ll learn what works, what doesn’t, and when to call in professionals before you cause damage trying to fix the problem yourself.
Understanding Adhesive Types and Why They’re Difficult to Remove
Not all adhesive is the same. The type of adhesive matters because different adhesives respond to different removal methods.
Temporary adhesives are designed to come off easily. These are used on stickers, decals, and protective films that manufacturers know will be removed. They’re water-based or pressure-sensitive and typically come off with minimal effort if you catch them fresh.
Permanent adhesives are designed to stay put. These are used on badges, emblems, and trim pieces that need to last the life of the vehicle. They’re stronger and designed to resist weather, heat, and UV exposure. These are the stubborn ones.
Double-sided tape adhesive is particularly problematic. It’s applied to both surfaces and creates a strong bond. When you remove the tape, adhesive residue stays on both sides.
Contact cement adhesive is extremely strong and designed for applications where movement could break a weaker adhesive. This is what’s used on some trim pieces and protective films.
Rubber-based adhesives are common on stickers and are relatively easy to remove when fresh but become harder and stickier as they age.
The challenge is that adhesive hardens over time, especially in sun and heat. Fresh adhesive is much easier to remove than adhesive that’s been baking on your paint for months or years. This is why removal gets progressively harder the longer you wait.
Why You Can’t Just Scrape It Off
Your first instinct might be to scrape the adhesive off with your fingernail or a tool. Sometimes that works. Often it doesn’t, or it causes problems you didn’t anticipate.
Scraping works if the adhesive is fresh, hasn’t bonded completely, and doesn’t require force to remove. But the moment you apply serious pressure or use a metal scraper, you risk scratching the clear coat. The paint on your car has a clear coat layer that’s only about 2 mils thick. A single scratch can compromise the protection and lead to paint damage, rust, or oxidation.
Even plastic scrapers can cause problems if used too aggressively. The goal is removing adhesive without damaging the protective clear coat underneath.
This is why understanding the right approach matters. The right method removes adhesive safely. The wrong method can cost you hundreds in paint correction to fix the damage you created trying to remove the adhesive.
Method 1: Heat Application (Fresh Adhesive)
Heat is often the first approach to try because it’s gentle and effective for fresh adhesive.
Heat softens most adhesives, making them more pliable and easier to remove. This is why that sticker on your bumper is easier to peel off on a hot day than a cold day.
You can apply heat using a hair dryer or heat gun. A heat gun is more effective because it gets hotter faster, but a hair dryer works fine if you’re patient. Set a heat gun to low-to-medium temperature. High heat can damage your paint. You’re warming the adhesive, not cooking it.
Hold the heat source about 6 inches from the adhesive and apply heat for 30 to 60 seconds. The adhesive will start to soften. You should be able to feel it becoming less rigid if you touch it gently.
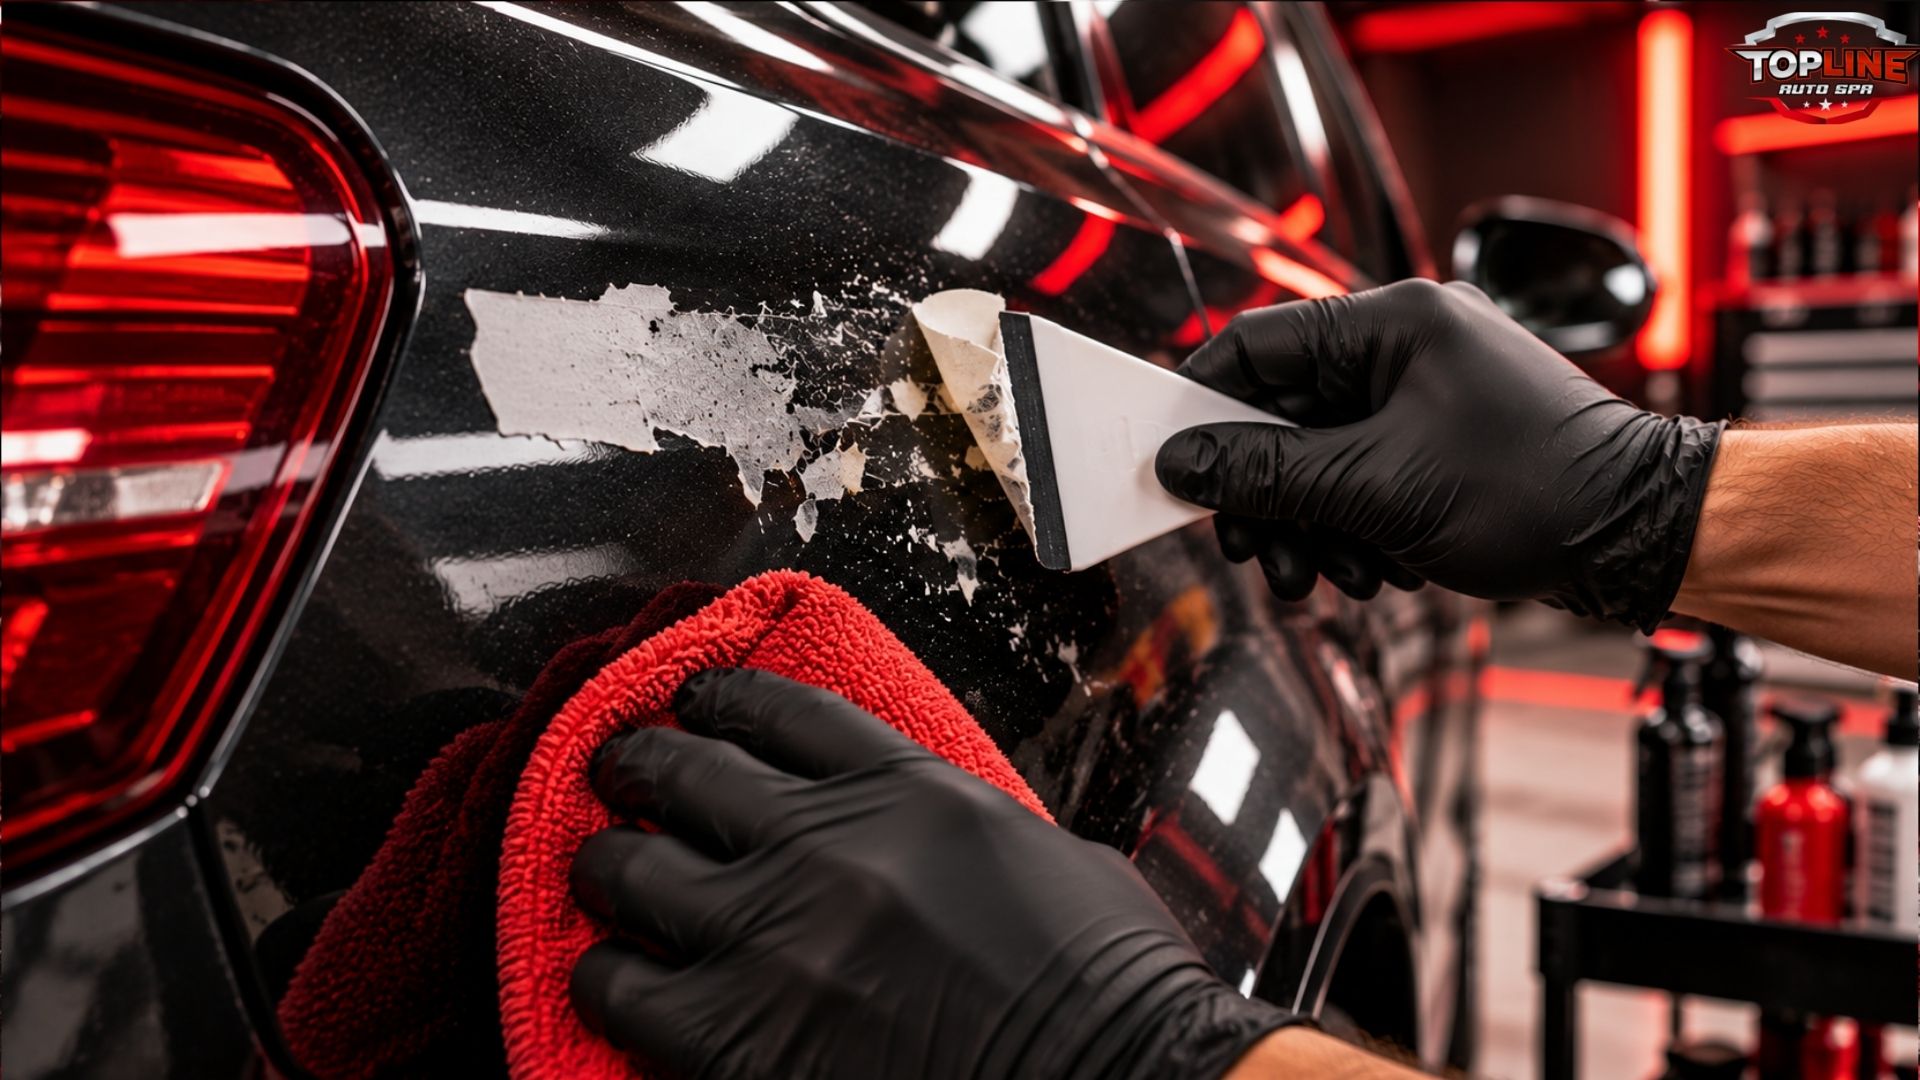
Once warm, use your finger or a plastic scraper to gently peel or roll the adhesive off. Start at an edge and work slowly. If it’s still too stiff, apply more heat. This slow approach works better than forcing it when it’s not quite ready.
The key is patience. Rushing and applying force defeats the purpose of using heat in the first place.
For stickers and protective film adhesive, this method works well. It takes 5 to 10 minutes but results in clean removal without damage.
Results: Excellent for fresh adhesive. Works on 80 to 90 percent of recent applications.
Method 2: Adhesive Remover Products
Commercial adhesive remover products are formulated specifically to dissolve adhesive compounds without damaging automotive paint.
These products work by breaking down the molecular bonds of the adhesive, making it easier to wipe or roll away. They’re not aggressive solvents that damage clear coat. They’re specifically designed for automotive use.
Popular products include Goo Gone Automotive, 3M Adhesive Remover, and other brands marketed for vehicle use. When choosing a product, make sure it’s rated for use on automotive paint and clear coat. Never use industrial solvents or products designed for non-automotive applications.
The process is straightforward. Apply the product according to label instructions. Most require you to let it soak for a few minutes to work on the adhesive. Then wipe or roll the adhesive away with a soft cloth or plastic scraper.
Key steps:
Apply product to the adhesive residue and let it sit for the recommended time (usually 3 to 5 minutes)
Use a soft microfiber cloth to gently wipe the area in circular motions
The adhesive should start rolling up as you wipe
Continue until all adhesive is removed
Wash the area with soap and water to remove product residue
Dry completely
This method is safer than scraping alone because the product softens the adhesive. It takes about 15 to 20 minutes for complete removal.
Results: Works well on most adhesives. Effective on adhesive that heat doesn’t fully soften.
Method 3: Rubbing Alcohol
Isopropyl alcohol is a solvent that breaks down many types of adhesive compounds. It’s less harsh than some commercial removers but effective for many applications.
Apply isopropyl alcohol (70 to 90 percent concentration) directly to the adhesive residue. Let it soak for a minute or two. The alcohol dissolves the adhesive bond.
Use a soft cloth to gently wipe the area. The adhesive should start to roll up as the alcohol works. Continue wiping until the residue is gone.
Wash the area with soap and water afterward to remove any alcohol residue.
This method works well for fresh to moderate adhesive residue. It’s gentler than commercial removers but takes slightly longer. For stubborn adhesive, rubbing alcohol might not be strong enough.
Results: Good for light to moderate adhesive. Less effective on heavy or aged adhesive.
Method 4: Clay Bar Treatment
Clay bars are used to remove contaminants from paint surfaces. They work by lifting embedded particles from the clear coat.
While not specifically designed for adhesive removal, clay bars can be effective for light adhesive residue or adhesive that partially came off but left a thin layer behind.
Spray clay lubricant on the affected area. Gently rub the clay bar over the adhesive in straight lines or circular motions. Use light pressure. The clay will pick up adhesive particles and contaminants.
Fold the clay to present a fresh surface periodically. When one side of the clay becomes loaded with residue, fold it to expose clean clay.
Continue until the adhesive is gone. Wash and dry the area afterward.
Clay bars are gentle on your paint. They remove surface contamination without aggressive scraping. The downside is they’re slower than other methods and work best on light adhesive.
Results: Gentle method for light adhesive. Takes time but very safe for your paint.
Method 5: WD-40 for Stubborn Adhesive
WD-40 is a penetrating oil that can break down adhesive compounds. While not designed specifically for automotive use on paint, many detailers use it effectively.
Apply WD-40 to the adhesive and let it soak for several minutes. The oil penetrates and breaks down the adhesive bond.
Gently wipe with a soft cloth. The adhesive should start to ball up and come away from the paint.
This method works particularly well on stubborn adhesive that won’t respond to heat or alcohol. The key is using light pressure to avoid scratching.
After removing adhesive, wash the area thoroughly with automotive soap and water to remove all oil residue. Any WD-40 left on your paint can attract dust and create a residue layer.
Results: Effective for stubborn adhesive. Requires thorough cleanup afterward.
Method 6: Solvent-Based Removers (For Heavy-Duty Adhesive)
For extremely stubborn adhesive like contact cement or aggressive permanent adhesives, stronger solvents might be necessary.
Products like acetone or lacquer thinner can dissolve heavy adhesive, but they’re aggressive and can damage your paint if not handled carefully. Only use these as a last resort when other methods have failed.
Test any strong solvent on a small, hidden area first. Apply it to a cotton ball and dab the area. Watch to see if it affects the paint or clear coat. If it causes any discoloration or damage, don’t use it on visible areas.
If testing is successful, apply the solvent carefully using a cotton ball or soft cloth. Use light pressure and minimal contact time. Wipe thoroughly afterward and wash the area with soap and water multiple times to remove all solvent residue.
Results: Effective on stubborn adhesive but requires careful handling. Risk of paint damage if misused.
Professional Paint Decontamination
If you’ve tried multiple methods without success or you’re concerned about damaging your paint, professional help is available.
Professional paint decontamination services use specialized equipment and products designed to remove contaminants including adhesive residue safely. Professional detailers have years of experience and can assess your specific situation.
They can remove stubborn adhesive that DIY methods won’t handle. They have access to products not available to consumers. Most importantly, they know how to remove adhesive without causing damage.
Professional adhesive removal typically costs between $50 and $200 depending on how much adhesive needs removal and how stubborn it is. This is a reasonable investment if DIY methods have failed or you’re concerned about your paint.
For Lehigh Valley residents, TopLine Auto Spa in Allentown offers professional paint decontamination services. If adhesive removal has become a problem, professional help guarantees safe removal without paint damage.
Protecting Your Paint After Adhesive Removal
Once you’ve successfully removed adhesive, your paint is more vulnerable to damage than before the removal process. This is the time to apply protective coatings.
Adhesive removal exposes the clear coat to elements. UV rays, dirt, contaminants, and weather can now damage what was previously protected. Applying a protective coating restores that protection.
Paint protection film or ceramic coating applied after adhesive removal gives you long-term protection against future damage and makes future adhesive removal easier. Paint protection film is a physical barrier. Ceramic coating is a chemical barrier. Both provide protection.
For areas where adhesive removal occurred, professional application of these products ensures complete coverage and proper application. This prevents future problems and protects your investment.
Prevention: Avoiding Adhesive Problems in the First Place
The best approach to adhesive removal is preventing adhesive problems from happening in the first place.
If you need to apply temporary stickers, decals, or protective film to your car, use products designed for temporary application. These have weaker adhesives that come off cleanly.
Remove temporary stickers and protective film as soon as they’re no longer needed. Fresh adhesive is much easier to remove than aged adhesive. Don’t let them sit for months.
Apply heat when removing temporary adhesive. It softens the adhesive and makes removal cleaner.
Consider using car paint protection products before applying adhesives. If your paint is already protected with ceramic coating or paint protection film, future adhesive removal is easier because you’re removing adhesive from the protective layer rather than from the paint itself.
Special Cases: Badges, Trim, and Emblems
Vehicle badges and emblems often use permanent adhesive. Removing them can leave significant adhesive residue.
Professional installers often soften the adhesive with heat before removing badges. They use specialized tools to minimize damage to the paint underneath.
If you need to remove a badge or emblem, the safest approach is professional removal. Detailers have the experience to remove these without leaving adhesive residue or causing paint damage.
If you must remove them yourself, use heat first to soften the adhesive. Be prepared for the possibility that some adhesive will remain. You might need professional help for complete residue removal.
When Adhesive Damage Becomes a Paint Repair Problem
Sometimes adhesive removal attempts cause damage that requires more than just adhesive removal to fix.
Light scratches from scraping can often be polished out during routine detailing. Deeper scratches require paint correction or repainting depending on severity.
If you’ve damaged the clear coat trying to remove adhesive, professional assessment is necessary. Paint correction can fix minor damage. Severe damage might require repainting a panel.
This is why using the right removal method matters. Attempting to save money by scraping adhesive yourself can result in damage costing hundreds to repair.
Timeline and Patience
Different adhesive removal methods take different amounts of time. Understanding the timeline helps you plan and maintain patience.
Heat method: 5 to 10 minutes
Adhesive remover product: 15 to 20 minutes
Rubbing alcohol: 10 to 15 minutes
Clay bar: 20 to 30 minutes
WD-40: 15 to 20 minutes
Professional removal: Depends on severity but usually same-day service
The time investment varies. The common thread is patience. Rushing the process risks damage. Giving the adhesive time to respond to the method you’re using prevents problems.
Conclusion: Adhesive Removal Doesn’t Have to Be Difficult
Adhesive residue on your car’s paint is a common problem but not an unsolvable one. The right approach removes it safely without damaging your investment.
For fresh adhesive, heat is your first choice. It’s gentle and effective. For stubborn adhesive, commercial removers or rubbing alcohol work well. For extreme cases, stronger solvents or professional help handles the job.
The key is understanding your situation. Is the adhesive fresh or aged? Is it from a sticker, protective film, or permanent badge? How much adhesive are you dealing with? The answers help you choose the right method.
Most adhesive removal situations resolve with one of the methods in this guide. If you’ve tried multiple approaches without success or you’re concerned about damaging your paint, professional adhesive removal is worth the investment. It’s cheaper than paint correction for damage you caused trying to fix the problem yourself.
Got adhesive residue on your car? Let the professionals handle it.
FAQ: Your Adhesive Removal Questions Answered
Q1: How long does it take to remove adhesive from car paint?
Timeline depends on the method and adhesive type. Heat application takes 5 to 10 minutes for fresh adhesive. Adhesive remover products take 15 to 20 minutes. Rubbing alcohol takes 10 to 15 minutes. Clay bar treatment takes 20 to 30 minutes. Professional removal services typically complete the job same-day, usually within an hour or two depending on how much adhesive needs removal. The key is not rushing the process. Patience during adhesive removal prevents damage that would take much longer to repair.
Q2: Is it safe to use a hair dryer to remove adhesive from car paint?
Yes, a hair dryer is safe for adhesive removal. It’s gentler than a heat gun because it reaches lower temperatures. Set it to medium heat and hold it about 6 inches from the adhesive for 30 to 60 seconds. The adhesive will soften and become easier to peel away. Hair dryers work particularly well on fresh adhesive from stickers or protective film. For extremely stubborn adhesive, a heat gun might be more effective because it reaches higher temperatures faster, but a hair dryer is perfectly safe and works well.
Q3: What’s the difference between adhesive remover and rubbing alcohol?
Adhesive remover products are specifically formulated for breaking down various types of adhesive compounds used on vehicles. They’re designed for automotive paint and won’t damage clear coats. Rubbing alcohol is a solvent that dissolves many adhesives but is less targeted. Adhesive remover products are generally more effective on tough adhesive because they’re formulated for specific adhesive types. Rubbing alcohol is cheaper and works on lighter adhesive but might not be strong enough for heavy residue. For best results, try rubbing alcohol first. If that doesn’t work, step up to adhesive remover products.
Q4: Can WD-40 damage my car’s paint?
WD-40 itself doesn’t damage automotive paint, but it must be cleaned off afterward. The oil can attract dust and create a film on your paint if left sitting. Always wash the area thoroughly with automotive soap and water after using WD-40 to remove all residue. Some detailers avoid WD-40 on paint because of the cleanup required, preferring products specifically designed for automotive use. If you use WD-40, just make sure to follow up with thorough cleaning and you’ll be fine.
Q5: Will scraping adhesive with a plastic scraper damage my clear coat?
Plastic scrapers are safer than metal but can still damage your clear coat if too much pressure is applied. The clear coat is only about 2 mils thick and is the only thing protecting your paint. Even plastic scrapers can scratch it if you scrape aggressively. This is why soften the adhesive first using heat or chemicals before scraping. Gentle scraping after the adhesive is softened requires minimal pressure and causes no damage. If you’re uncomfortable with scraping, skip it entirely and use other methods instead.
Q6: What should I do if adhesive removal damaged my car’s paint?
Light scratches can often be polished out during routine detailing. If damage is more significant, professional paint assessment is necessary. Paint correction can fix minor scratches and damage. Severe damage might require repainting. The cost depends on damage severity. This is why using proper removal methods prevents expensive repairs. If damage does occur, get professional evaluation as soon as possible. Fresh damage is easier to assess and repair than old damage.
Q7: How do I remove adhesive from protective film after removing the film?
Protective film adhesive is usually relatively weak and comes off easily with heat or adhesive remover products. After removing the protective film, any remaining adhesive responds well to heat gun treatment for 30 to 60 seconds followed by gentle wiping. If that doesn’t work, adhesive remover product or rubbing alcohol typically removes what remains. Protective film adhesive is designed to be temporary, so removal is usually straightforward. The most important step is starting the removal as soon as possible rather than letting the adhesive cure and harden.
Q8: Can I use acetone to remove adhesive from my car’s paint?
Acetone is an aggressive solvent that can damage automotive paint and clear coat. It should only be considered as an absolute last resort when other methods have completely failed. Before using acetone, test it on a small hidden area to see if it damages the paint. If you proceed, use minimal acetone on a cotton ball with very light contact time. Wash the area thoroughly afterward. Most adhesive situations resolve with safer methods. Reserve acetone for only extreme cases where professional help isn’t an option.
Q9: What’s the best way to prevent adhesive problems in the future?
Apply temporary adhesive products only when necessary and remove them as soon as possible. Use heat when removing temporary items like stickers or protective film. Don’t let adhesive sit on your paint for extended periods. The longer it stays, the harder it becomes to remove. Consider applying paint protection products that make future adhesive removal easier. If you regularly use stickers or decals, protective film or ceramic coating creates a barrier that future adhesive adheres to rather than your actual paint, making removal cleaner.
Q10: When should I call a professional for adhesive removal instead of doing it myself?
Call a professional if you’ve tried multiple DIY methods without success, if you’re concerned about damaging your paint, if the adhesive covers a large area, if it’s from a permanent application like a badge, or if the paint is valuable or high-end. Professional removal is also worthwhile if your time is valuable and you’d rather have it done quickly. The cost of professional removal ($50 to $200) is much less than the cost of paint correction if you accidentally damage the finish yourself. When in doubt, professional help is the safer choice.